 Perilous
 Trade Packs
Craft a region's goods, strap them to your back, and haul them to a town that will pay for them - the further and the riskier the road, the bigger the payout.
Overview
Trade packs are the shard's caravan trade. You do not buy a pack - you craft one from a town's own recipe out of crops, honey, and livestock you grew or bought, then carry it overland to a buyer in another town. The pack rides on your back the whole way, and it pays out based on how far you took it and how hungry the destination is for the goods.
It is one of the best gold-per-hour activities in the game, but it is not passive and it is not safe. A loaded pack cannot recall or gate, slows you on a mount, and marks you as a walking payday. Players who learn the routes and travel in numbers do very well. Lone haulers who wander a full pack through hostile ground tend to donate it to whoever finds them.
The Loop
The cycle is always the same:
- Gather the goods. Each recipe wants two stacks of regional produce plus a Merchant Certificate. Grow them, buy them, or trade for them - see Agriculture.
- Craft the pack. Use that town's Specialty Workbench. The finished pack is stamped with its origin town and auto-shouldered onto your back.
- Haul it. You keep it on the whole trip. See Carrying a Pack for what that costs you.
- Turn it in. Double-click a Trade Outlet in a different town (or Tortuga's Black Market) while standing next to it. Gold goes to the bank; a treasure cache goes to your pack.
Crafting a Pack
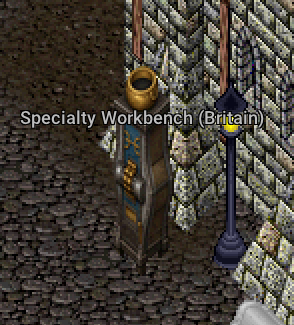
Every producer town has one Specialty Workbench, and each bench only shows that town's recipe. You cannot craft a Minoc pack at the Britain bench - the region lock is what forces goods to move around the map. A standard recipe is 20 of one crop + 10 of another + 1 Merchant Certificate, and each craft costs 50 stamina.
| Town | Pack | Ingredients |
|---|---|---|
| Britain | Royal Honey Loaves | 20 Wheat + 10 Honey + 1 Certificate |
| Skara Brae | Lavender Sachets | 20 Lavender + 10 Cotton + 1 Certificate |
| Yew | Abbey Mead | 20 Hops + 10 Honey + 1 Certificate |
| Trinsic | Cured Olive Crate | 20 Olives + 10 Lemons + 1 Certificate |
| Minoc | Smoked Pipeweed | 20 Tobacco + 10 Barley + 1 Certificate |
| Vesper | Spiced Cocoa Bricks | 20 Cocoa + 10 Sugar + 1 Certificate |
| Moonglow | Honeyed Tea Chest | 20 Tea Leaves + 10 Honey + 1 Certificate |
Merchant Certificates are the universal third ingredient. Buy them from the Farmer, or have a scribe make them (Inscription 80: 10 Blank Scrolls + 1 Beeswax).
Merchant's Fatigue
You cannot just grind the same route all day. Every pack you craft counts against a rolling 24-hour Merchant's Fatigue counter, and the tier you are in when you craft is stamped onto the pack - a pack made while tired pays less even if you deliver it tomorrow.
| Crafts in 24h | Tier | Reward |
|---|---|---|
| 1 - 20 | Tier 1 | 100% of the pack's value |
| 21 - 30 | Tier 2 | 50% |
| 31 - 40 | Tier 3 | 25% |
| 41+ | Over cap | The workbench refuses to craft |
The bench shows your current count and next tier before you commit, so you always know what the next pack is worth.
What a Pack Pays
An overland pack's gold is base value × distance band × demand × fatigue. Distance is the big lever: short hops between neighbors pay little, long cross-map hauls pay the premium.
| Route band | Multiplier |
|---|---|
| Adjacent | 1.00× |
| Medium | 1.25× |
| Far | 1.50× |
| Very Far | 1.75× |
| Tortuga | 3.50× |
Demand shifts the payout up or down, and every route carries its own. A route starts at 100% demand and moves between a 70% floor and a 130% ceiling. Every pack you turn in on a route nudges that route's demand down a little, so a lane that gets farmed hard slowly slides toward 70% and pays less the more you run it. Leave a lane alone and its demand recovers on its own, climbing back up over time until a well-rested route pays as much as 130%. That is the reward for spreading your runs around instead of hammering one lane: find the route others have not touched lately and it pays the premium. Tortuga is the exception - it ignores demand entirely and always pays its flat 3.50×.
Distance bands are still being tuned to the current map, so the exact band for a given pair can change. The payout math and the multipliers above are what the system uses right now - confirm a specific route's band at a live outlet.
Elite Goods
Each town also has an Elite Goods recipe that swaps in livestock meat and dairy and costs 2 Merchant Certificates instead of one (for example, Britain's "Britannian Beef Jerk" is 10 Rack of Ribs + 10 Honey + 2 Certificates). An Elite pack pays double gold and doubles the turn-in treasure cache. The meat only comes from livestock, so Elite runs lean on ranchers - see Agriculture.
Carrying a Pack
A fresh pack is auto-equipped on your back as a wooden crate (it sits in the back slot and coexists with a cloak). You cannot take it off. It only leaves you when you turn it in, deposit it into a Merchant Galleon's hold or onto a pack animal, or die. You also cannot carry two at once.
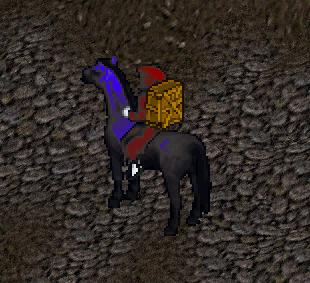
While you (or a pack animal following you) are hauling:
- No fast travel. You cannot fast-travel while hauling - Gate Travel and the Flight Paths are both blocked. You move it the hard way.
- Mounted speed drops to 75% of normal mounted run speed. On foot there is no speed penalty. A rideable pack mount is walk-locked while you ride it.
- You are a target. A gold-hued Merchant Galleon is obvious on the horizon, and pirates carry a Corsair's Sextant that pings every hauler within 500 tiles.
- Death drops it to the ground where you fell - not into your corpse. It sits there as an immovable crate that anyone can walk up to and shoulder (if they are not already carrying one).
Turning It In
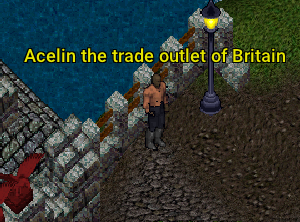
Each producer town has a standing Trade Outlet vendor. Shoulder your pack, stand next to the outlet, and double-click it. The outlet will not buy a pack made in its own town, so a Britain pack has to be sold somewhere else. The gold is deposited straight to the bank and split:
- 80% to whoever delivered the pack.
- 20% to whoever crafted it (the pack remembers its crafter). If you crafted and delivered it yourself, you get the full 100%.
That split is what lets a guild specialize: farmers craft packs, haulers run them, everyone gets paid.
On top of the gold, the deliverer also gets a treasure cache dropped into their backpack - the full payload of a treasure-map chest of a level set by the route. This cache ignores fatigue and demand; only the distance matters.
| Route | Treasure cache |
|---|---|
| Adjacent | Level 2 chest |
| Medium | Level 3 chest |
| Far | Level 4 chest |
| Very Far | Level 5 chest |
| Tortuga | Level 6 chest |
Every single turn-in, at any distance, also rolls the server-wide unique pool at its lowest odds - a hit is announced to the whole shard. Elite packs double the entire cache.
Tortuga & the Black Market
Tortuga is the eighth hub and the fattest payout. Its buyer is the Black Market Trader, who takes a pack from any town, pays the flat 3.50× (at full fatigue, before the 80/20 split and before Elite doubling), and hands over the top-tier Level 6 cache.
The catch: the Black Market Trader only comes to port five times a day - at 0200, 0800, 1200, 1600, and 2000 Eastern - and Tortuga is a lawless PvP zone. The best gold on the shard is also the most dangerous to collect, so time your run for when the Trader is in.
The Merchant Galleon
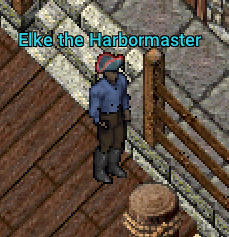
For hauling by sea, the Harbourmaster sells a Merchant Galleon deed. It is a large ship, hued gold from bow to sail, with a hold that caps at 20 trade packs. You can double-click your worn pack while aboard to stow it in the hold, letting one ship move a whole caravan's worth of cargo.
That gold hull is a beacon. If a Merchant Galleon sinks, everything in the hold spills into gold-colored flotsam at the wreck site - free for anyone to loot for about 45 minutes before it decays. The one-pack-per-person carry rule still applies, so a full hold can be picked apart by a whole boarding party but not scooped up by one pirate.
Tips
- Scout the route before you craft. A loaded pack cannot recall home if the road turns out to be an ambush.
- Distance is the money. A Very Far or Tortuga run is worth several short hops - haul long, not often.
- Watch your fatigue. Past 20 crafts a day your packs are worth half, then a quarter. Space out big sessions.
- Craft into a rested lane. If a route has been farmed to 70% demand, take the goods somewhere else for the premium.
- Split the work. Let a farmer craft and a group haul - 80/20 means everyone still gets paid, and a convoy survives.
- Elite packs and Tortuga runs are the top of the income ladder, and also the most exposed. Bring friends.