 Perilous
 Ships & Sea
A full how-to for buying, outfitting, crewing, sailing, and fighting your ship.
Overview
The ocean is a live part of the shard, not just water between towns. You pilot a boat, kit it out with combat and travel upgrades, hire a fighting crew, ride out storms, and fight other ships. Most of the high-value sea play - piracy and Trade Pack hauling - happens out here, and the open ocean is lawless, so a ship is both an investment and a target. This page walks you through the whole thing: buying a hull, fitting it, crewing it, and working the cannons in a fight.
Getting a Ship
Ships are sold by the Harbormaster at the docks. Double-click one to open the shop; he hands out ship deeds that you place in the water to launch, plus all the naval supplies you need. Everything is priced in both Plunder and gold - the shop shows both columns and you can pay with either, or a mix of the two. You keep one ship deployed at a time, and only the owner can steer it, so nobody sails off in your hull while your back is turned.
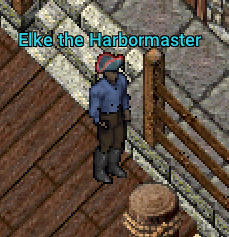
The Harbormaster also stocks the gear that makes a ship fight and survive:
| Supply | What it is |
|---|---|
| Culverin Deed | A light deck cannon: standard damage, full range, standard reload. |
| Carronade Deed | A heavy deck cannon: 1.5x damage, 2 tiles less range, 2 seconds longer reload. |
| Blundercannon Deed | A massive deck cannon: double damage, 4 tiles less range, 4 seconds longer reload. |
| Cannonball | Ammunition. You need one per shot. |
| Black Powder | The charge for each shot - one per shot alongside the ball. |
| Message in a Bottle | A treasure lead for deep-sea diving. |
| Ship Repair Tools | 10 charges of hull repair (also craftable with Carpentry). |
| Spyglass | Scans the horizon for ships and hazards (50 uses). |
Exact deed and supply prices are set in-game and get tuned, so read the current numbers off the Harbormaster's shop window rather than memorizing them.
Ship Types
There are six hulls, each with a job. The four warships all take the full slate of upgrades and crew; the Fishing Boat and Merchant Galleon are purpose-built haulers.
| Ship | Role |
|---|---|
| Schooner | Small, fast, cheapest to buy. Two crew slots. |
| Galleon | The all-rounder warship. The most crew - four slots. |
| Man of War | Heavier hull that absorbs more punishment, about 10% faster base sailing than the Galleon. Three crew slots. |
| Barque | A raider's hull: about 20% faster base sailing than the Galleon, at the cost of one fewer crew slot (three). |
| Fishing Boat | Carries a hold for stowing caught sport-fish. |
| Merchant Galleon | Dedicated cargo hull for hauling Trade Packs in bulk. |
Sailing
Boats work the classic way: place your ship, climb aboard, and pilot it either by steering with the mouse or by giving the tillerman a course and letting it run. Bigger hulls carry more and take more punishment. One thing to know if you are hauling cargo: a set course captures its speed at the moment you issue it, so a mid-sail speed change - a storm slowing you, or a speed upgrade kicking in - will not take hold until you re-issue the course. Mouse-piloting picks the new speed up right away.
Shallow Water
Shallow reef areas require a special upgrade to travel. Shallow tiles near shore block ships unless your boat has the Shallow Draft navigation upgrade. Without it you bump the shallows and have to keep to deeper water; with it you can nose right up to coastlines other captains cannot reach - useful for landing where nobody expects a ship.
Storms
Storms roam the map and you will sail into them. There are always a handful active, each parked over a wide stretch of the world for a while before it moves on. Inside a storm you get real weather - rain at sea (snow over land), rolls of thunder, and a fog that closes in around you like a fog-of-war, cutting how far you can see. A storm also slows your ship by about 20%, so a squall between you and port costs you time. It will not sink you - storms do not damage the hull - but they will blind and slow you, and that is when other ships come hunting. The Fog Runner sail upgrade flips that penalty into a bonus, and radar upgrades still pick out nearby ships and storm zones through the murk.
Your Ship Loadout
Every ship has a loadout: five upgrade slots and a set of crew slots. You open and manage it from the Ship Loadout window.
- Type
[galleon,[manofwar,[schooner, or[abyssalgalleonto open the window. Each ship keeps its own loadout, and the portrait tabs across the top let you switch between all four while the window is open. - Install an upgrade: click the Install button on a category row, then target the upgrade item in your backpack. It is consumed as it installs.
- Remove an upgrade: click Remove on that row. The upgrade returns to your backpack ready to re-install.
- Hire crew / dismiss crew: use the Hire and Dismiss buttons in the crew section (see Crew below).
Upgrades and crew can only be changed while your ship is dry-docked. If a ship is deployed in the water the window will refuse the change and tell you to dry-dock first (use the tillerman's dry-dock option). You can still use an already-installed active ability at sea - you just cannot swap what is fitted.
Every Ship Upgrade
Upgrades slot into six categories - Hull, Sail, Cannon, Lesser Cannon, Navigation, and Utility - and you fit one per category. Because each slot holds a single upgrade, outfitting a ship is about choosing an identity. Below is the complete catalog. Entries marked [Active] are fired on command (see Using Active Upgrades); [Auto] entries fire themselves when a condition is met; the rest are always-on passives.
| Upgrade | What it does |
|---|---|
| Reinforced Hull | +5,000 maximum hull HP. |
| Ironclad Plating | −20% cannon damage taken. |
| Watertight Hold | If you sink, your hold's items float for 5 minutes to be recovered. |
| Brine-Treated Timbers | Your ship is not crippled until 10% hull instead of 25%, so you keep full speed deep into a losing fight. A crippled hull still sails, at 20% speed; only a sinking ship, or one with enemy boarders on deck, cannot move. |
| Copper Sheathing | 50% more hull restored by the Ship Repair Saw. |
| Spiked Gunwhales | Anyone who boards you takes 25% of their max health as damage over 5 ticks. |
| Emergency Bulkhead | [Auto/Active] Repairs the hull to 25% when it drops to 10% or lower; can also be triggered on command. 5-minute cooldown. |
| Inflammable Coating | Your hull cannot catch fire or take burn damage. |
| Spiked Prow | Ramming deals an extra 2,000 hull damage to the target. |
| Salvage Hold | +500 weight and +100 item capacity in the hold. |
| Tsunami | [Active] A tidal wave rolls out from both sides of your hull for 15 tiles. Every enemy ship it crosses is carried 15 tiles along with it, crew and pets riding along, until land or a ship the wave did not hit stops it. |
| Kraken of the Deep | [Active] A kraken surfaces around your ship and slams the water: every enemy ship close by loses 20% of its maximum hull and cannot move for 5 seconds. |
| Upgrade | What it does |
|---|---|
| Battle Sails | −25% incoming cannon damage. |
| Ghost Sails | NPC ships do not aggro you. Firing on or engaging an enemy ship drops the veil for 20 seconds. |
| Blood Sails | +10% speed for 2 minutes after you sink an enemy ship, stacking up to three times. |
| Desperate Wind | [Active] Burst to 150% speed for 8 seconds. |
| Chain Rigging | Hull damage no longer slows your ship. |
| Midnight Sails | Invisible on enemy minimaps during night hours. |
| Fog Runner | +20% speed inside storms, instead of the usual slowdown. |
| Silk Sails | +20% speed while you are not combat-flagged. |
| Upgrade | What it does |
|---|---|
| Heavy Cannons | +30% cannon damage, +3 seconds reload. |
| Swivel Guns | If the side you fire is out of shots, your other battery fires instead. Never both at once. |
| Auto-Loader | −2 seconds reload time. |
| Double-Shot Brace | Fires your whole volley twice, at +5 seconds reload (15 seconds between volleys). |
| Incendiary Rounds | 20% chance per shot to set the enemy deck on fire (500 hull damage over 30 seconds). |
| Anchor Bolt Launcher | [Active] Immobilize a target ship for 8 seconds. |
| Barrage System | [Active] Instantly resets your cannon cooldown for another volley. |
| Silenced Charges | Your cannon fire does not flash on enemy minimaps. |
| Dead Man's Volley | [Auto] Fires all loaded cannons at 150% damage when your hull hits 15% or lower. |
| Powder Horn Cache | −5 seconds cannon reload (5 seconds between volleys). |
| Iceberg Cannon | [Active] Greater cannon: an icicle that takes 15% of the target ship's maximum hull on impact and leaves it taking 20% more damage from everything for 30 seconds. |
| Explosive Ordinance | [Active] Greater cannon: one heavy shot into the hull, then a fiery mess on that deck for 10 seconds. Anyone standing in the flames loses 5% of their maximum health a second. |
| Upgrade | What it does |
|---|---|
| Chainshot | [Active] Chains into the enemy sails: 10% slower, then 20%, then 30%, over 30 seconds. |
| Cluster Shot | [Active] A shell that splits over the enemy deck. No hull damage; heavy damage to NPC crew and pets, less to players. |
| Bone Shot | [Active] A pile of bones that scatters on the enemy deck: light hull damage, and three bone knights claw up onto that deck and fight everyone aboard, their own crew included. |
| Upgrade | What it does |
|---|---|
| Navigator's Wheel | [Active] +20% sailing speed for 10 seconds (120-second cooldown). Your escape button. |
| Crow's Nest | Reveals nearby ships on the minimap. |
| Reinforced Mast | −10% hull damage taken. |
| Current Reader | Shows SOS and message-bottle locations within 100 tiles on the minimap (needs an SOS in your pack). |
| Battle Anchor | [Active] Lock your position for +25% cannon damage; raising the anchor takes 5 seconds. |
| Shallow Draft | Sail into shallow water other ships cannot enter. |
| Deep Keel | +10% speed while out of combat. |
| Storm Chart | Reveals storm zones, ghost ships, and Armada spawns on the world map. |
| Waterspouts | [Active] Raise three waterspouts at a spot up to 20 tiles away. A ship that touches one loses its steering and spins for 5 seconds. |
| Upgrade | What it does |
|---|---|
| Grappling Hooks | +25% boarding success chance. |
| Repair Crane | Auto-repairs 50 hull HP every 30 seconds. |
| Alchemist's Furnace | 10% chance a cannonball explodes for +10% bonus damage. |
| Sea Net | [Active] Slows all ships and creatures within 10 tiles by 50% for 10 seconds. |
| Medic Station | Every player and crew member on board regenerates 1 HP per second. |
| Arcane Relay | Spells cast by friendly players and crew on board deal +10% damage. |
| Oil Barrels | [Active] Leaves a burning oil trail in your wake for 5 seconds; enemy ships that sail through it burn (Inflammable Coating stops the damage). |
| Fog Cannon | [Active] Enemy cannons have a 40% chance to miss you for 30 seconds. |
| Depth Charges | [Active] Drop an unseen depth charge off the stern. Ten seconds later it detonates, and every ship near that spot is 50% slower for 30 seconds. |
| Flaming Barrels | [Active] Fiery barrels float in your wake for 10 seconds. A hull that touches one, or the timer, sets it off for 20% of that ship's maximum hull. |
| Fog Bank | [Active] A blinding fog rolls over the screen of every player within 50 tiles, you included, for 10 seconds. |
Exact upgrade numbers are tuned in-game; confirm the current values in your loadout window and at the outfitter.
Using Active Upgrades
Upgrades tagged [Active] are fired on command. You can click the Use button on that row in the loadout window, or type the matching command while aboard your ship:
| Command | Fires the active upgrade in… |
|---|---|
[ActivateHull | your Hull slot (Emergency Bulkhead, Tsunami, Kraken of the Deep). |
[ActivateSail | your Sail slot (Desperate Wind). |
[ActivateCannon | your Cannon slot (Anchor Bolt Launcher, Barrage System, Iceberg Cannon, Explosive Ordinance). |
[ActivateLesserCannon | your Lesser Cannon slot (Chainshot, Cluster Shot, Bone Shot). |
[ActivateNavigation | your Navigation slot (Navigator's Wheel, Battle Anchor, Waterspouts). |
[ActivateUtility | your Utility slot (Sea Net, Oil Barrels, Fog Cannon, Depth Charges, Flaming Barrels, Fog Bank). |
Each category shares a 5-minute cooldown after use (Navigator's Wheel runs on its own 120-second cooldown). Only the ship's captain can activate upgrades, and you must be aboard. A Chief Engineer in your crew shortens these cooldowns.
Crew
Crew turn your deck into a fighting one. A crew member comes from a Crew Contract - a deed that drops from sea combat (pirate ships, ghost ships, and Armada ships) and from sea-boss loot. Each contract has a type (its bonus) and a tier from Common up to Legendary - the higher the tier, the stronger the bonus and the tougher the deckhand.
Assigned crew are not just passive bonuses: each one appears on your deck as a real fighting NPC that guards you, fights what attacks you, and can board enemy ships alongside you. Crew slots by ship: Galleon 4, Man of War 3, Barque 3, Schooner 2.
To add or change crew, dry-dock your ship, open the loadout window
([galleon / [manofwar / [schooner / [abyssalgalleon), and in
the crew section:
- Hire: click a slot's Hire button, then target a Crew Contract in your backpack.
- Dismiss: click Dismiss on an occupied slot - the contract returns to your backpack, so crew are never lost by swapping.
Two commands manage the crew already on your deck at sea:
[crewbelow- send your crew below deck to rest and heal to full. They commit to it for 5 minutes.[crewabove- bring them back up on deck (after the 5 minutes).
Tiers
Every contract carries one of five tiers: Common, Uncommon, Rare, Epic, Legendary. The tier is a straight multiplier on the bonus below (a Rare Gunner, tier three, gives three times the per-tier value) and it sets how hard the deckhand is: health, damage, armour and weapon skills all climb with tier, and the hand's gear improves at tiers three and five. The boat outfitter sells Common contracts of every type. Higher tiers drop from sea combat, or you make them yourself: a Contract Renegotiations deed (from the Perilous Vendor) combines five contracts of the same type and tier into one of the next tier. Legendary is the top and cannot be combined further.
What a hand does on deck
Every hired hand stands on your deck as a real fighter of their tier. They guard you, follow the captain's stance
([crew attack, guard, follow, stay, status, or just say
"crew attack"), throw a harpoon every 5 seconds at anything hostile within 10 tiles that they cannot reach with a
blade, hunt down boarders on your own deck before anything else, chase a fleeing enemy across the rail onto a hull
that touches yours, and never run away. The Sea Witch is a spell caster: she fights with magery
instead of steel, with caster skills that grow with her tier, on top of the mana she feeds the crew. Slain crew are
knocked out of commission and rejoin the deck after five minutes.
| Crew | Bonus |
|---|---|
| Repairman | Passive hull repair - 1% of max hull per tier every 60 seconds. |
| Powder Monkey | Faster reload - −0.5 seconds per tier. |
| Navigator | +2% sailing speed per tier, always on. |
| Surgeon | +1 HP every 3 seconds per tier to everyone on board. |
| Gunner | +4% cannon damage per tier. |
| Marine | +5% health and damage for every deckhand aboard, per tier; every Marine you carry counts. |
| Sea Witch | +1 mana every 3 seconds per tier to everyone on board. She fights with magery. |
| Smuggler | +3% Plunder per tier. |
| Lookout | +5 tiles minimap detection range per tier. |
| Spymaster | −5 tiles to how far enemies can spot you on the minimap, per tier. |
| Veterinarian | +1 pet HP every 3 seconds per tier. |
| Rare Collector | +1% rare drop rate per tier. |
| Chief Engineer | −10 seconds upgrade cooldown per tier. |
Cannons & Firing
Naval fights are cannons and boarding. Buy deck cannons and their ammunition from the Harbormaster, mount the cannons on your ship, then load and fire in two steps.
Load: keep cannonballs (or grapeshot) and black powder in your backpack, then type
[loadcannons to load both sides at once - up to 8 shots per side. To load a single
side, use [loadcannons port or [loadcannons starboard. Loading takes ammunition from your
backpack only. The hold is storage: nothing is ever drawn from it, so move a resupply into your pack before you reload.
Fire: type [firecannons, then click the tile you want to hit. The game picks
port or starboard automatically from where you clicked, spends one shot from that side, and the
volley travels to the marked tile and lands as a short barrage - lead a moving target so all of it connects.
Cannon fire can hit crew on deck as well as the hull. There is roughly a 10-second cooldown
between volleys, shortened by Powder Horn Cache or lengthened by Double-Shot Brace, and the slowest cannon
aboard sets the reload: a Carronade adds 2 seconds, a Blundercannon 4. A cannon that cannot reach the
marked tile holds its fire while the longer-ranged ones shoot.
Swapping a cannon: double-click one of your deck cannons to change its type between a Culverin (light), a Carronade (heavy) and a Blundercannon (massive) - you need the matching deed in your pack, and the cannon you pull out is refunded as a deed.
Repairs
You patch hull damage with a repair tool, used from your backpack while aboard. There are two:
- Ship Repair Tools (bought from the Harbormaster, 10 charges; also craftable with Carpentry, where a crafted kit carries 20 charges plus one per wood grade above plain and patches 10% more). Double-click and it channels for about 4 seconds, then restores 5% of your max hull per charge. Each player can use a kit once every 30 seconds, in or out of combat.
- Ship Repair Saw (craftable with Carpentry, 10 charges plus one per wood grade above plain). Double-click, target your deck, and it works for 10 seconds while you keep sailing and fighting, restoring 2000 hull per use plus 200 per wood grade (a Perilwood saw restores 3400). No cooldown, but only one tool can work on a hull at a time. The Copper Sheathing hull upgrade boosts the amount it restores.
Some upgrades and crew repair for you automatically - Repair Crane, a Repairman in your crew, and the Emergency Bulkhead all mend the hull without a tool.
Boarding
When you close the distance, boarding sends your deck crew across to fight the enemy's. Bring your hull
alongside the enemy ship (within about 14 tiles), then type [board and target the enemy ship's rope or
deck. Your living on-deck crew leap across and hold the enemy deck for 2 minutes, fighting its crew
(and any enemy players) so you can soften up the boarding party before you cross yourself. A captured NPC ship keeps
its hold sealed until its crew is dead, so you have to win the deck before you loot the hold.
The ocean is lawless by default, which means these fights carry no murder counts, but full loot is on the table. Being at sea is consent to fight. See Lawless Zones for how that works.
Sportfishing
The deep sea is also where the big fish live. Sportfishing is a hook-and-fight minigame: sail out to a feeding frenzy (marked by circling seagulls), hook a prize fish, and win the fight to land it. Carry the catch home strapped to your back and cash it in at a Prize Fish Buyer for treasure-tier rewards. The full breakdown of the fish and the controls lives on the Sportfishing page.
For crossing the water without a hull, the ethereal dolphin sea-mount is covered on the Mounts & Flight page.
Tips
- Fit for a purpose: pick one Hull, Sail, Cannon, Navigation, and Utility upgrade that tell one story - a raider, a tank, or a hauler.
- Hauling cargo? A set course will not pick up a storm's slowdown or a speed upgrade - re-issue it, or mouse-pilot.
- Load both sides before a fight with a single
[loadcannons, then just[firecannonsand click. - Ghost Sails hides you from NPC pirates only until you shoot - sneak or fight, not both.
- Keep a Gunner and a Powder Monkey aboard for a hard-hitting, fast-reloading broadside; add a Chief Engineer to shorten your active-upgrade cooldowns.
- Dry-dock before you re-fit: upgrades and crew can only be changed with no ship deployed.
- Keep a radar upgrade fitted for storm season; the fog is when ambushes happen.